
ByteDance · Seedream V5.0 Flash
Seedream 5.0 Flash for images that start with your idea
Start in the workspace above: describe a new image, or switch to editing and upload a reference. Seedream 5.0 Flash gives you text-to-image and image-to-image workflows with practical controls for composition, output size and file format. You can prepare your request before signing in; submitting a generation requires an account and sufficient credits.

What is Seedream 5.0 Flash, and when should you choose Pro or Lite?
Seedream 5.0 Flash is ByteDance’s image generation and editing model: create an image from text or edit existing images with references. The official Seedream guide positions Flash as the faster, lower-cost option compared with Pro. Choose it when you want to explore compositions and make repeated edits while keeping the cost per image low.
Seedream 5.0 Flash
On Kuca, 1K, 1.5K and 2K each cost 3 credits per output image, for both text-to-image and reference-image editing. Moving up to 2K keeps the same price, making Flash a practical choice for trying several visual directions.
Seedream 5.0 Pro
Choose Pro when image quality is your priority; this is also its positioning in the official guide. In Kuca’s workspace, text-to-image costs 6 credits per image at Standard quality (1K) or 12 at High quality (2K). Pro editing also factors in the number of reference images, so compare the workspace estimate for your selection.
Seedream 5.0 Lite
Choose Lite when you need the larger output sizes available in Kuca’s workspace: Standard quality (2K), High quality (3K) and Ultra quality (4K). Each size costs 5 credits per output image for text generation and editing. For a 1K–2K workflow, compare Flash’s lower credit cost; for 3K or 4K output, select Lite.
Flash editing accepts up to 10 reference images in JPEG, PNG or WebP, with a maximum of 30 MB per file. Use references for subjects, composition or style, and describe what each image contributes. Kuca’s Flash price stays the same across the supported reference-image counts.
Compare models in the tool aboveA closer look at the official examples
Images from BytePlus’s official Seedream showcase.
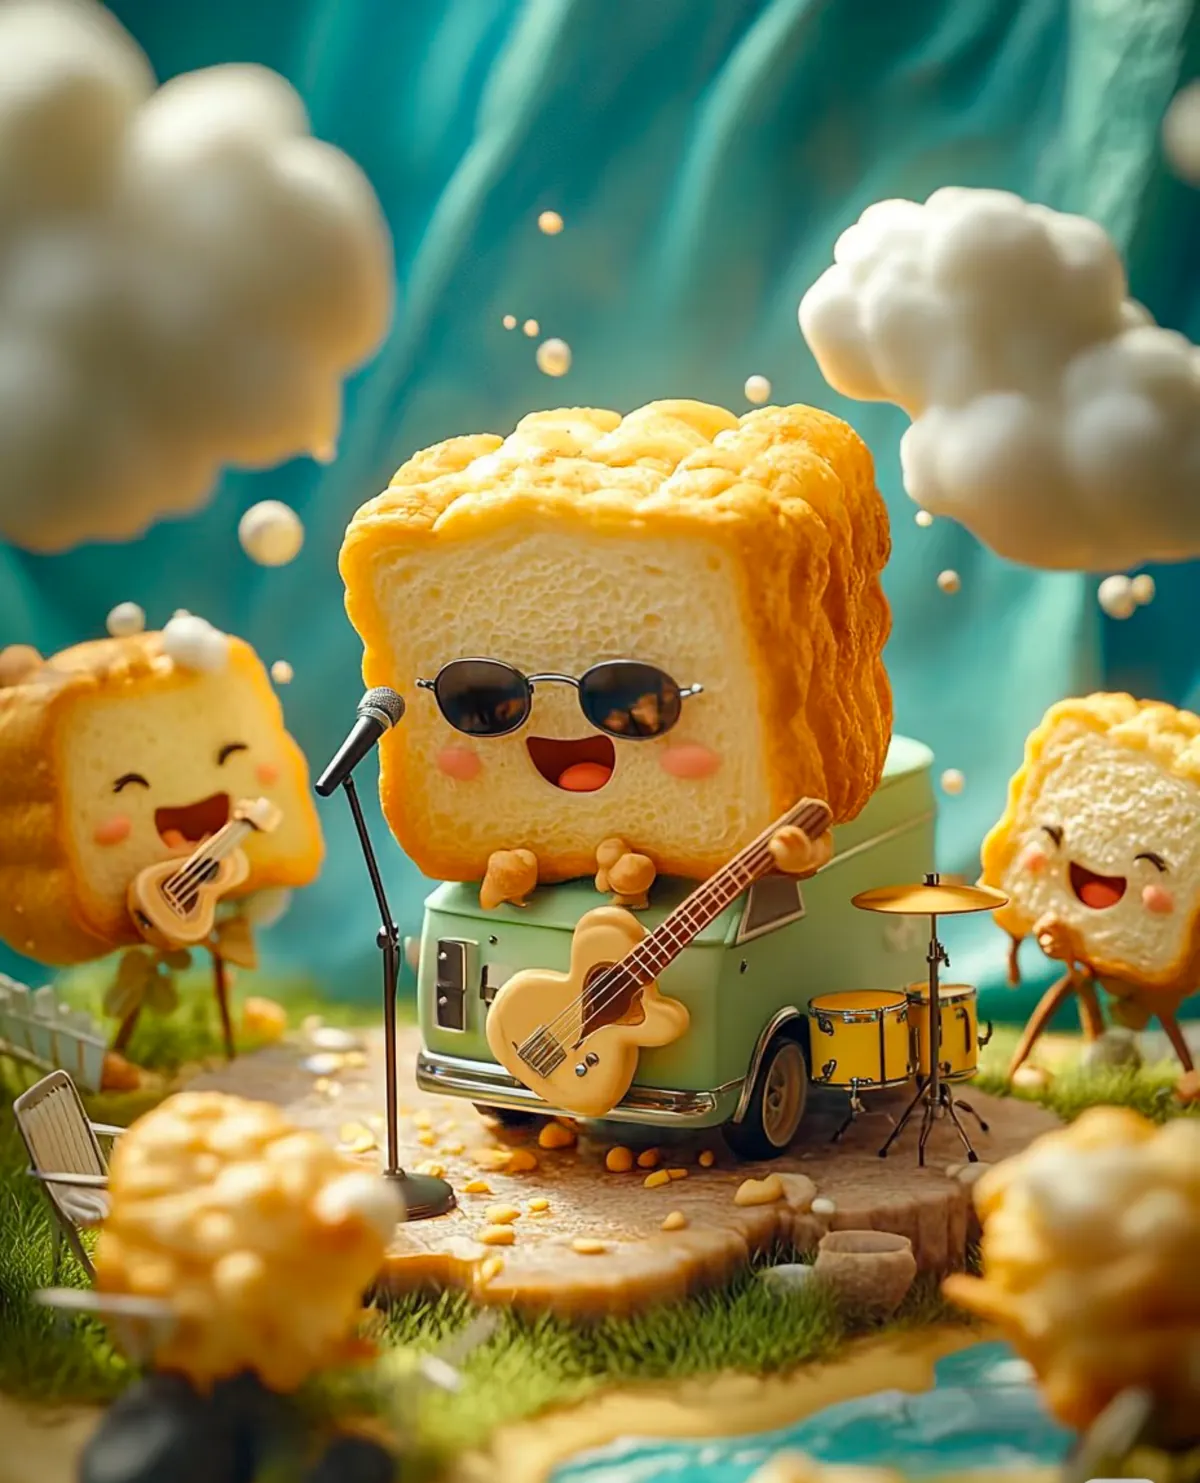
Official example
Character-led illustration
A playful food character, warm textures and a miniature scene.
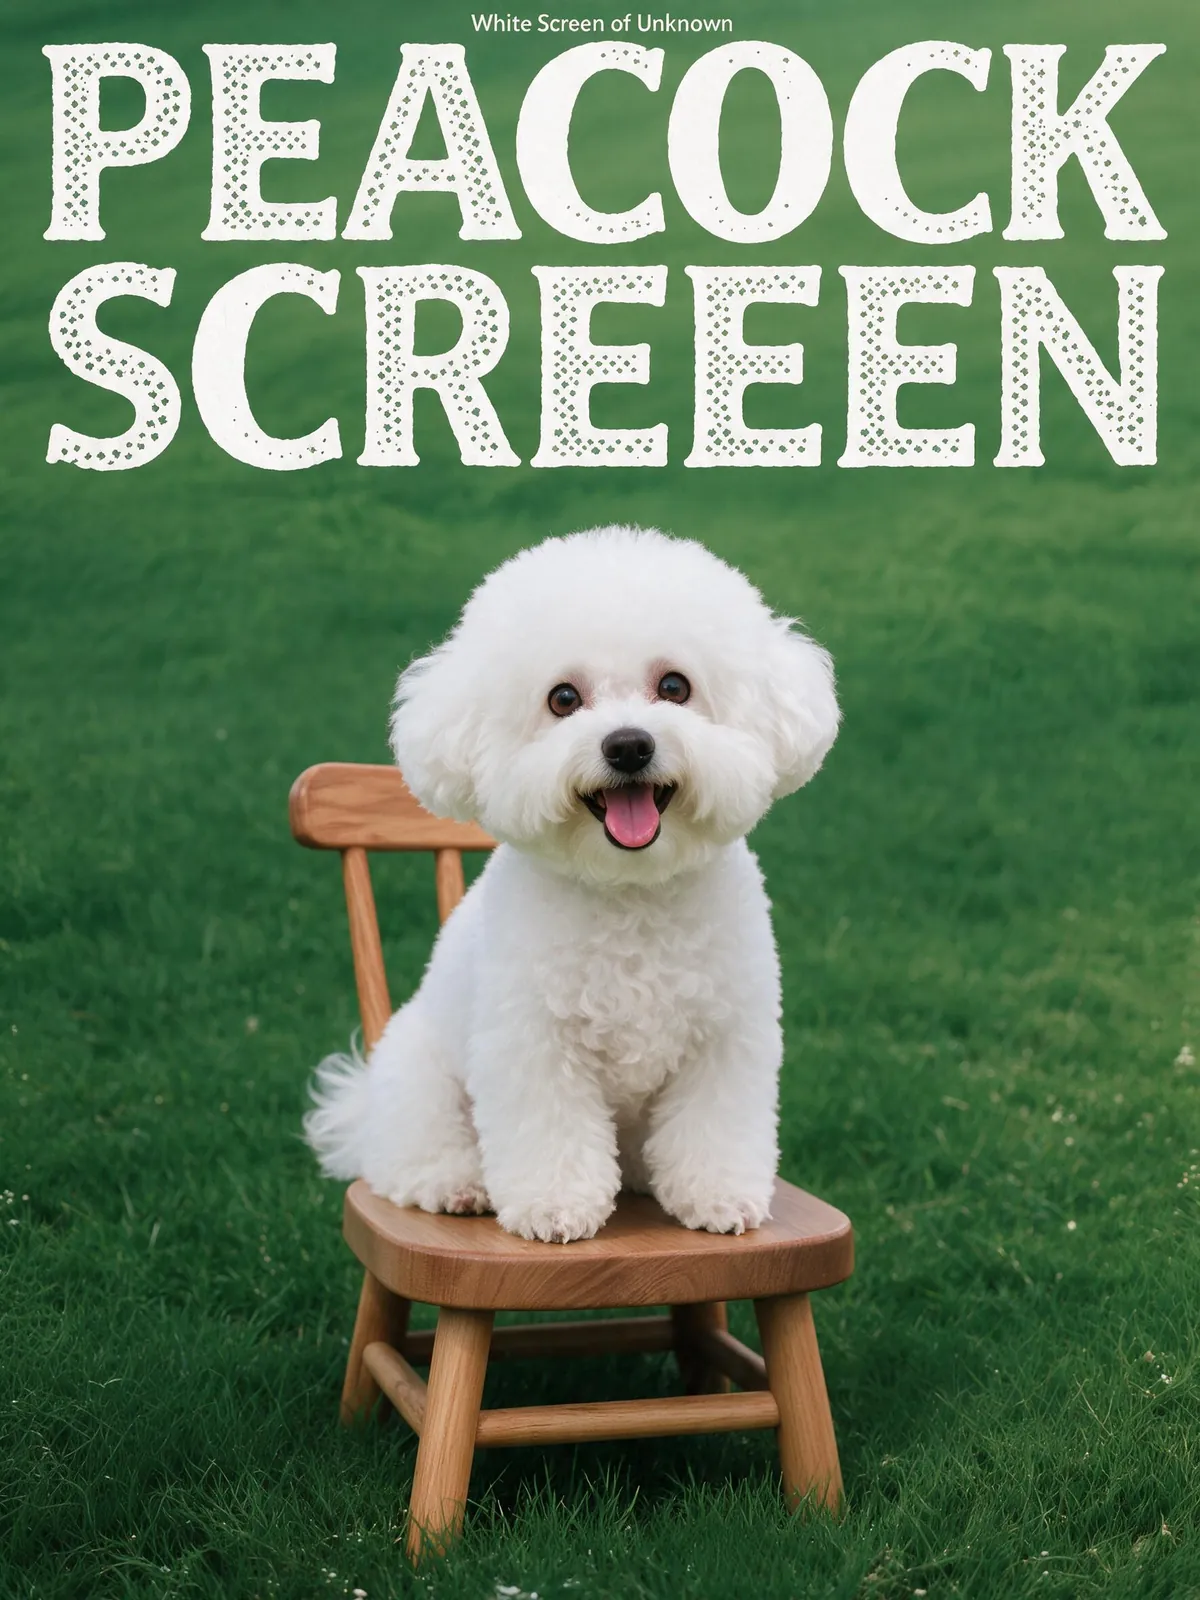
Official example
Bring a subject into a poster
The official cross-image editing example places a white dog into a green poster layout. It shows how a reference subject can become part of a different composition.
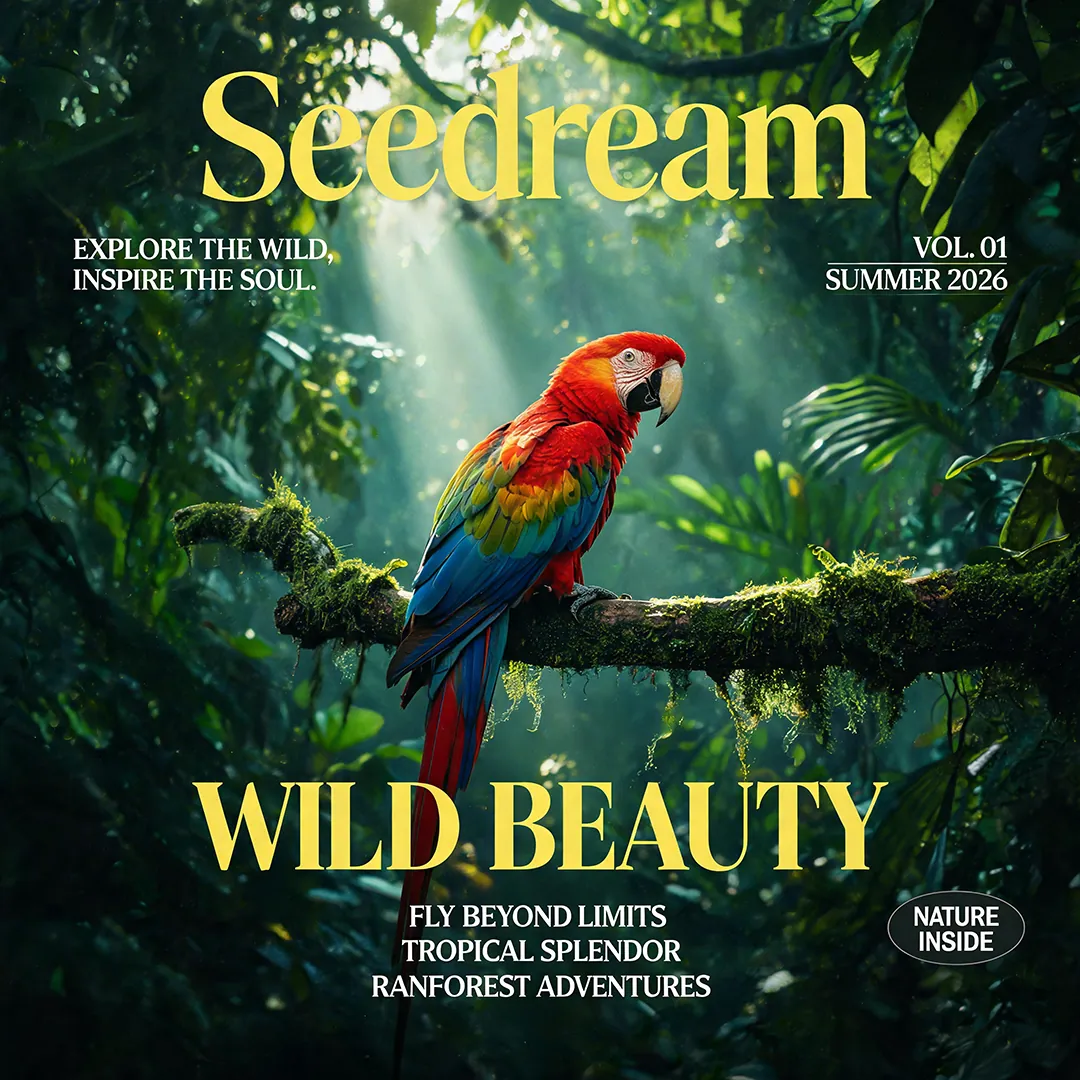
Official example
An editorial cover composition
The nature-cover source image combines a vivid subject, layered foliage and headline space.
From a short brief to a useful first draft
An image brief does not need a wall of adjectives. Begin with the subject, explain what the image is for, and describe the few details that make the result useful. For a product photograph, those details might be a pale background, a believable glass surface and space for a headline. For an illustration, they might be a limited palette, an overhead view and a clear silhouette. This Seedream 5.0 Flash AI image generator is most useful when each request has one understandable purpose.
Treat the first result as a candidate rather than a finished asset. Inspect the overall layout before polishing minor details. If the product is too small, revise the framing; if the scene feels busy, remove secondary objects. Keep the instructions that worked so you can tell whether your next change improved the image. This makes iteration more intentional than repeatedly adding style words.
Create from text or edit a reference
Use text-to-image when you want to explore a scene without an existing picture. The prompt describes the visible subject, its setting and the intended treatment. Choose image editing when you already have a source photograph or a composition worth keeping. Switch to the Flash editing variant, upload the source and state both the change and the features that should stay. An instruction such as “replace the background with warm stone, preserve the bottle shape and label placement” gives the edit a clear boundary.
The editing input accepts up to ten references. More images are not automatically better: one sharp source is often easier to interpret than several conflicting views. If you add a second reference, explain its role, such as lighting or color. Check every upload has finished before submitting. A reference guides the result, but it does not guarantee exact geometry, identity or unchanged lettering.
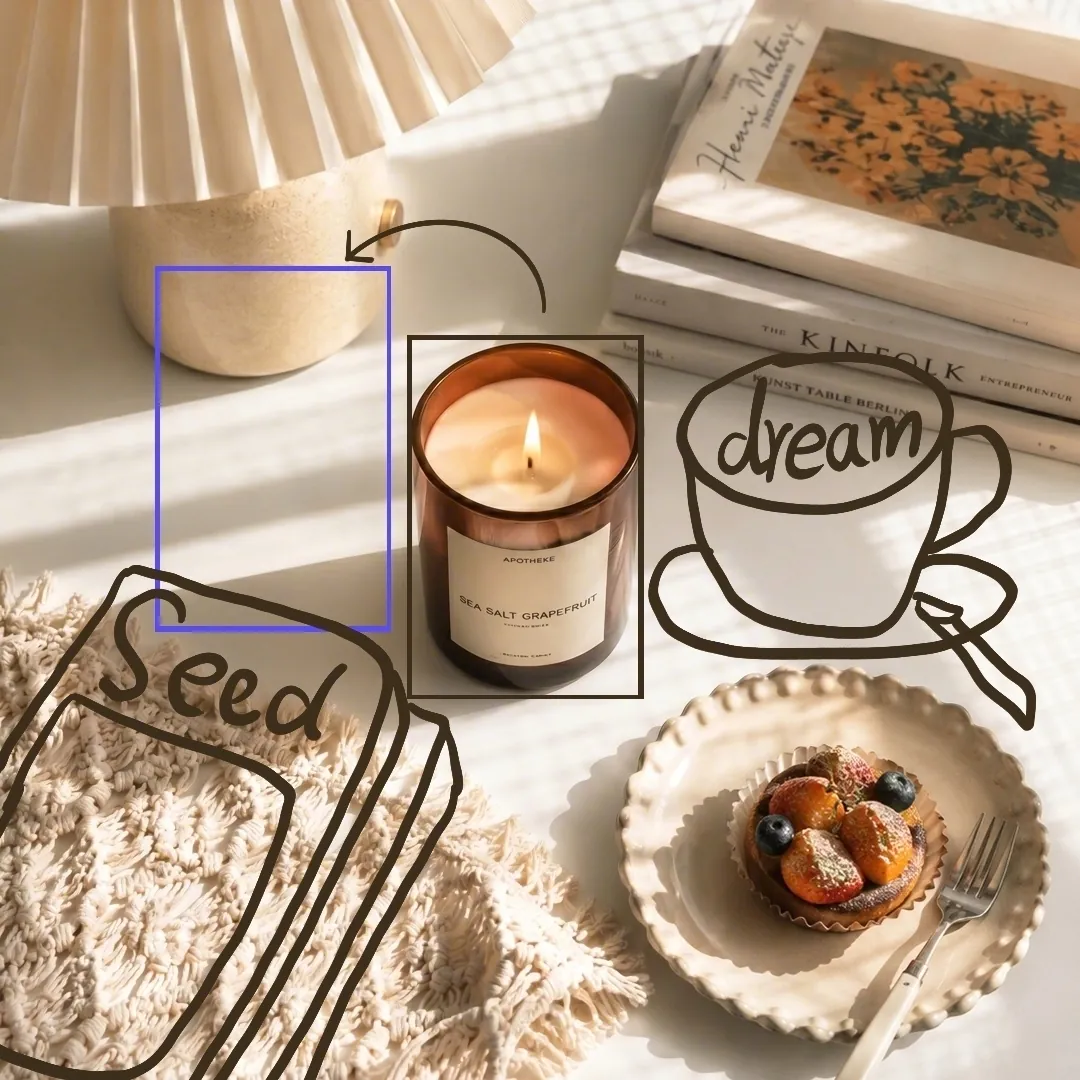
From a marked-up reference to a finished scene
In the official example, drawn guides request books on the left and a coffee cup on the right. The output removes the guides and adds those objects. Both images are preserved in full for comparison.
Build a prompt around visible decisions
Start with a concrete noun and an action or arrangement. Then add the viewpoint, crop, light and material. “A ceramic cup on a linen napkin, photographed from above in soft window light” provides more usable direction than “beautiful, amazing, professional.” Mention the destination when it changes the layout: a vertical story needs different space from a wide website banner. Give the model a clear hierarchy so the primary subject remains more important than the decorative background.
Separate essentials from preferences. If a red handle must remain visible, say so directly; if the background may vary, do not describe five incompatible environments. For an edit, name the source element you want to preserve before explaining the replacement. After reviewing a result, change one major instruction at a time. Keep your prompt with the selected image so a later revision does not depend on remembering what you typed.
Match the output to the destination
Flash offers 1K, 1.5K and 2K output tiers in this workspace. Select the tier alongside the aspect ratio, not as a substitute for it. A square product card, a vertical social post and a horizontal cover each need a different composition. The available ratios include 1:1, 4:3, 3:4, 16:9, 9:16, 2:3, 3:2 and 21:9. Leave extra breathing room around important objects when the destination may crop the image again.
Choose PNG or JPEG for the downloaded output. PNG is useful when you want to avoid additional lossy compression; JPEG can be convenient for photographic material and lightweight sharing. Neither selection promises an editable layered file or a transparent background. Inspect the downloaded dimensions when a publishing platform specifies exact pixels. A resolution tier describes an output class, not one universal width for every ratio.
Product concepts, campaign images and editorial scenes
For a product concept, describe the material and the contact between the object and its surroundings. A realistic shadow and a consistent camera angle matter more than an elaborate backdrop. For campaign exploration, create a small set of directions with distinct palettes or lighting, then select one before producing variations. Keep the same subject description across those variations so the comparison reflects your art direction rather than an entirely different object.
Editorial images benefit from a clear story: an empty desk before opening hours, a table prepared for a gathering, or a close view of a handmade detail. Avoid asking one frame to explain a whole narrative. Generated scenes can support planning and creative production, but should not be presented as documentary evidence of a real event. Review product claims and visual details before attaching the image to a commercial offer.
Handle lettering and multilingual briefs carefully
You can write a brief in the language you normally use. When lettering belongs inside the image, provide the exact phrase in quotation marks and explain where it should sit. A short sign or a single headline is easier to inspect than a dense menu. Request enough empty space and contrast to keep the letters separate from decorative details. Check spelling, accents, punctuation and reading order at full size rather than judging only the thumbnail.
For a final advertisement, a reliable workflow is to generate the visual base and add approved text in your design editor. This lets you control typography, legal lines and last-minute changes without regenerating the picture. Seedream V5.0 Flash can be part of that workflow, but no image model should be treated as a substitute for proofreading. An attractive composition with incorrect text is still an unfinished deliverable.
Multilingual lettering
The official tutorial illustrates multilingual lettering with a hand-drawn greeting bubble.

References, rights and visibility before you submit
Editing supports JPEG, PNG and WebP inputs, with up to 30 MB per reference. Upload a clear image rather than a tiny screenshot that has already lost important detail. Only use material you own or have permission to process, especially when a reference contains a recognizable person or a protected design. A good prompt cannot resolve a missing permission or an unclear license.
Also check the visibility setting in the workspace. Accounts without a successful payment must use public generation; private generation is available to eligible paid accounts. Do not upload confidential documents, unreleased packaging or sensitive personal material into a public workflow. If an upload fails, retry or remove it before generating. Keeping reference selection and visibility deliberate prevents a creative test from becoming an unwanted disclosure.
Make revisions without losing the working version
Check the displayed credit estimate before each request and keep enough balance for the revision you intend to make. Queue conditions, the selected workflow and provider availability can affect processing. Once submitted, follow the task status in the workspace instead of clicking the generation button repeatedly while a request is still running.
When the image is ready, compare it against the original brief at full size. Check edges, reflections, object count and any text. Download a working candidate before exploring a different direction, and keep a simple record of the changes you made. If a request fails, read the reported status before retrying. A smaller, more precise adjustment is usually easier to evaluate than replacing every part of a prompt at once.
A prompt you can adapt
An editorial photograph of one unbranded amber glass bottle on a pale limestone plinth. Soft window light from the left, a restrained warm palette, natural reflections and a gentle contact shadow. Keep the bottle in the right half and leave clean negative space on the left for a headline to be added later. No lettering, no logo, no decorative objects. Wide 3:2 composition.
Replace the subject and materials, then choose the matching ratio in the tool; text alone does not change the ratio control.
Using Seedream 5.0 Flash: practical questions
How do I generate my first image?
Keep Seedream 5.0 Flash selected, enter a description and choose the ratio, output tier and format. Review the credit estimate, sign in if needed and submit. You can type your brief before signing in, but actual generation requires an account with enough credits.
How do I edit an existing picture?
Choose the Flash editing variant and upload at least one reference. Explain the requested change and what should remain unchanged. Wait for all uploads to complete. Use up to ten JPEG, PNG or WebP files, each no larger than 30 MB.
Can I generate a 2K image?
Yes. Select 2K in the resolution control before submitting. The exact dimensions depend on the aspect ratio. Download and inspect the file if your publishing destination requires a specific pixel width or height.
Why is my result different from the reference?
A reference guides generation rather than locking every pixel. Simplify the request, describe the features to preserve and remove conflicting references. If exact packaging text or layout is essential, finish that part in a dedicated editor.
Are my uploaded references private?
Check the workspace visibility setting before uploading. Private generation requires eligible paid access; accounts without a successful payment use public generation. Avoid sensitive references when the request is public.
What should I do if a task fails?
Check the displayed error and upload status first. Confirm the prompt and required inputs are present, then retry only after the failed task is resolved. Do not submit duplicate requests while an earlier generation is still processing.
Continue your creative workflow
GPT Image 2.5
Explore text-to-image generation and image editing with GPT Image 2.5.
Image to video
Use a finished still as the starting point for a video.
Plans and credits
Review account options before planning a larger batch.